hexo next 这个博客主题挺流行的,但是有一些显示效果不是很喜欢,一般来说我们可以 git clone 下来 next 这个主题源码再进行修改相应的样式,不过 next 提供了自定义 css 的能力,通过提供一个自定义的 style 文件就可以相应的修改显示效果,参考官方链接的使用方法Custom Files ,下面分享一下我做的一些修改。
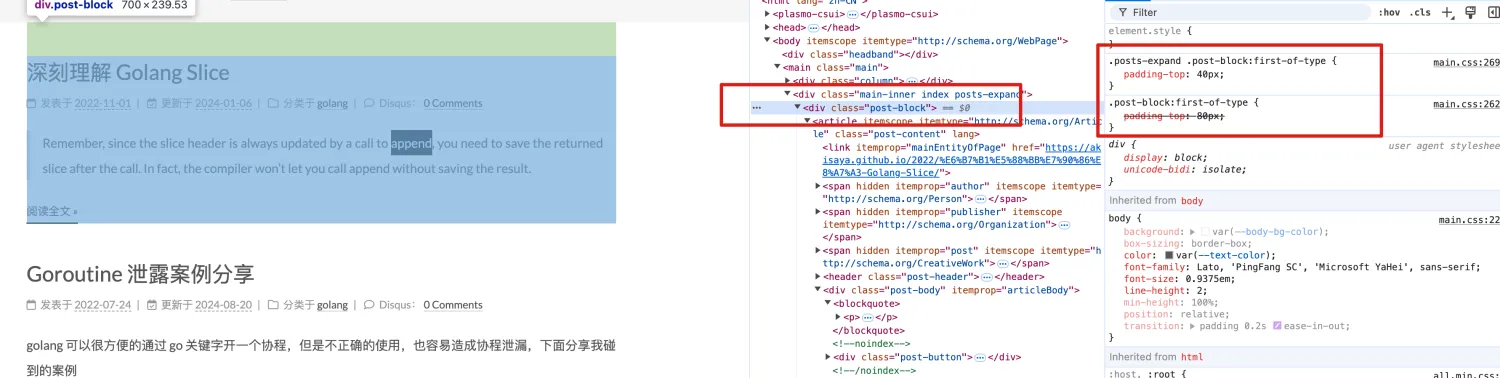
如何修改 定位CSS 这个其实通过浏览器的开发者工具页面可以找到,我们找到相应元素的 css 类,然后可以自行调整其中的属性值达到我们
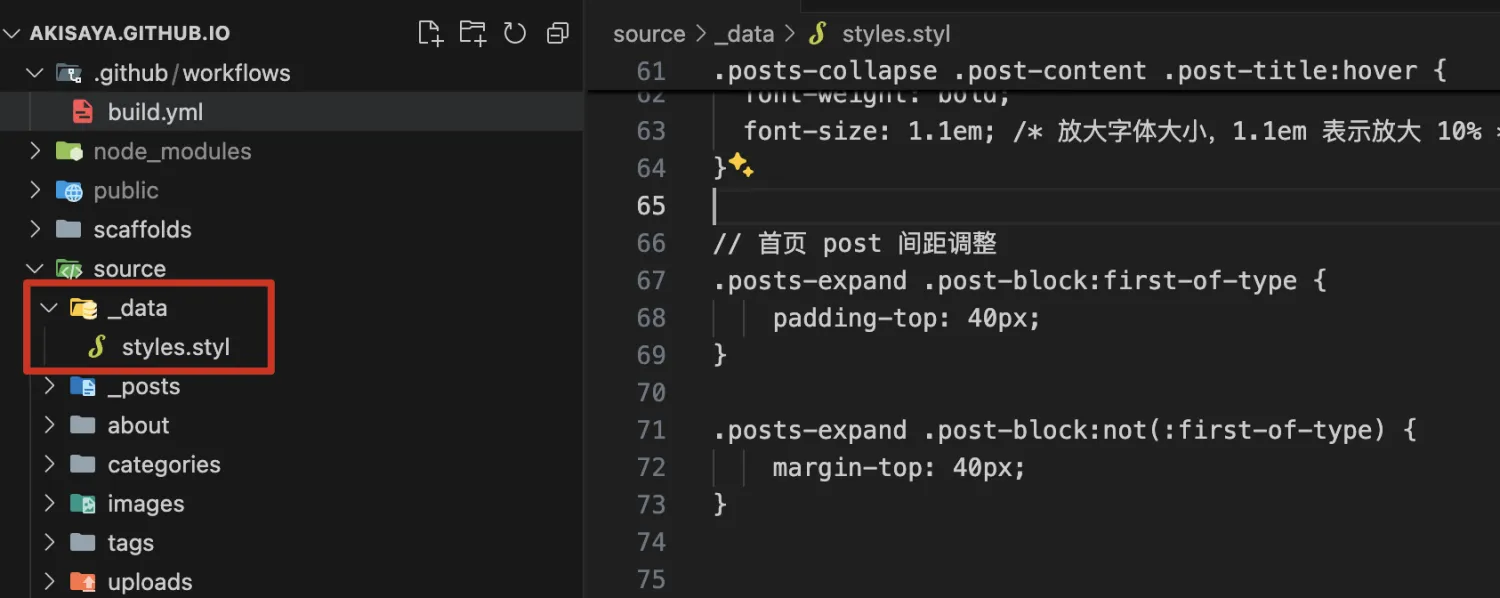
next style 配置 参考 Custom Files ,在 source/_data/styles.styl中添加 css
我的修改 注:本文的修改都是基于 NexT.Mist 主题调整的, 主页 post 调整只在 NexT.Mist 生效,archive 页的调整基本都适用于其他 NexT 主题
主页 post 更加紧凑 调整后
1
2
3
4
5
6
7
.posts-expand .post-block :first -of-type { padding-top : 40px ; } .posts-expand .post-block :not (:first -of-type) { margin-top : 60px ; }
原来的 post 之间间隔太大了,首页点进去感觉过于稀疏了
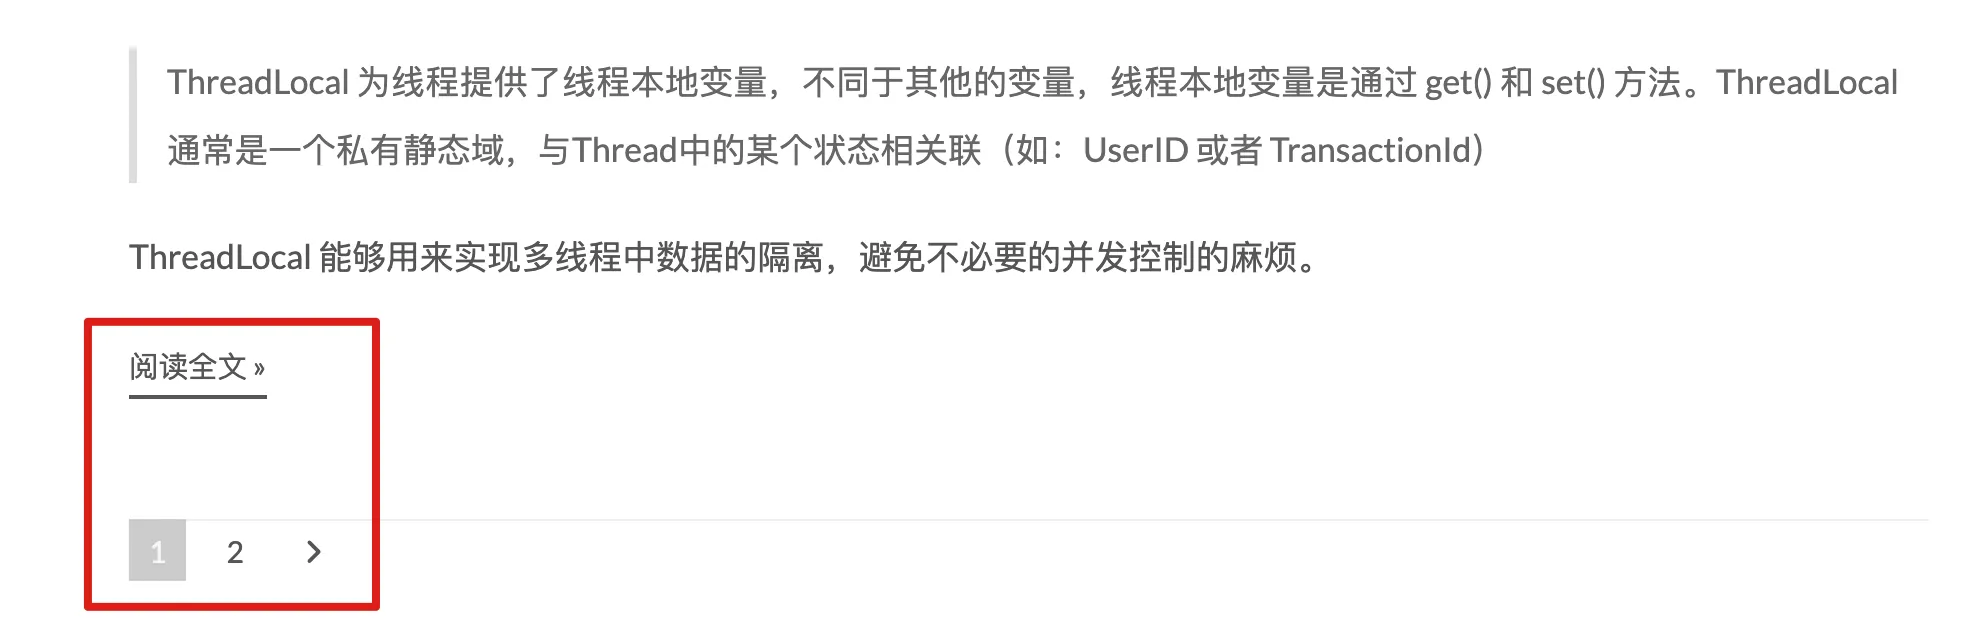
翻页按键边缘与 post 边缘对齐,翻页按键与 post 间距缩小 调整前,间距大,按钮边缘没对齐
调整后
1
2
3
4
5
6
7
8
9
// 分页 .pagination { margin : 60px 0 0 ; } .pagination .prev , .pagination .next , .pagination .page-number , .pagination .space { margin : -1px 10px 0 0 ; padding : 0 10px ; }
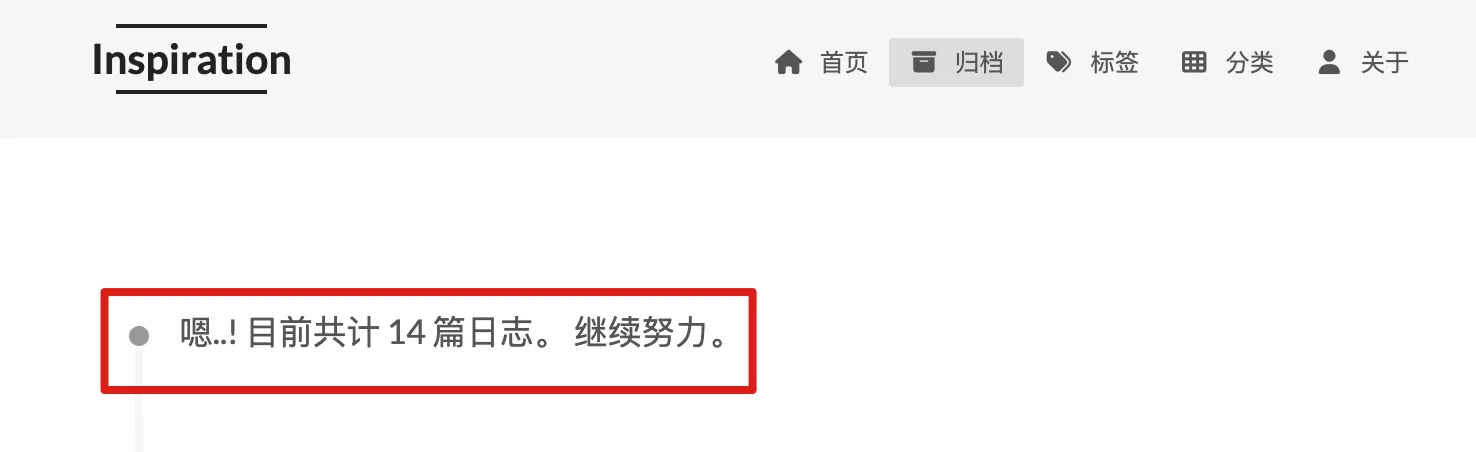
归档页面 去掉归档页的文档统计
1
2
3
.posts-collapse .post-content .collection-title { display : none !important ; }
年份缩进,标题间距调整,标题字体放大,竖线改细等 调整前
1
2
3
4
5
6
7
8
9
10
11
12
13
14
15
16
17
18
19
20
21
22
23
24
25
26
27
28
29
30
31
32
33
34
35
36
// 竖线是这个 before 元素控制的,改细,同时稍微一动位置与标题栏前的圆心对齐 // 左侧的竖线原来太抢眼了,这里弱化竖线的视觉效果 .posts-collapse .post-content ::before { background : var (--archive-post-content-before-color) margin-left: -0.5px top: 1em width: 1px } // 年份缩进,看起来就更有层次感 .posts-collapse .post-content .collection-year { margin : 40px 0 0 0 ; } // 去掉掉年份前的圆点 .posts-collapse .post-content .collection-year ::before { display : none; } // 调整归档页面的上的间距 .posts-collapse .post-content .collection-header { margin : 0 0 0 0 ; } // 文档标题字体整体放大,强调一下视觉效果 .posts-collapse .post-content .post-header { font-size : 1.1em } // 文档标题前的日期字体方法,原来其实是个缩小效果,这么写之后就取消了缩小效果 .posts-collapse .post-content .post-meta-container { font-size : inherit; } // 减小页面最上方的空隙 .archive .post-block :first -of-type { padding-top : 0 ; }
竖线的夜间模式 调整前
1
2
3
4
5
6
7
8
9
10
11
12
13
14
15
16
17
18
19
20
21
22
23
24
25
:root { --archive-post-content-before-color : #f5f5f5 } if (hexo-config('darkmode')) { @media (prefers-color-scheme : dark) { :root { --archive-post-content-before-color : #454545 } } } // 这里竖线的颜色使用到了 css 的变量,然后在 :root 上面定义了日间和夜间模式使用的颜色值 // 这个定义变量的方式从next代码里趴出来的 .posts-collapse .post-content ::before { background : var (--archive-post-content-before-color) margin-left: -0.5px top: 1em width: 1px } // 年份数量统计有背景色,这里取消掉 .posts-collapse .post-content .collection-year ::before { display : none; }
next 定义的 css color 变量
文档标题添加动画 调整前
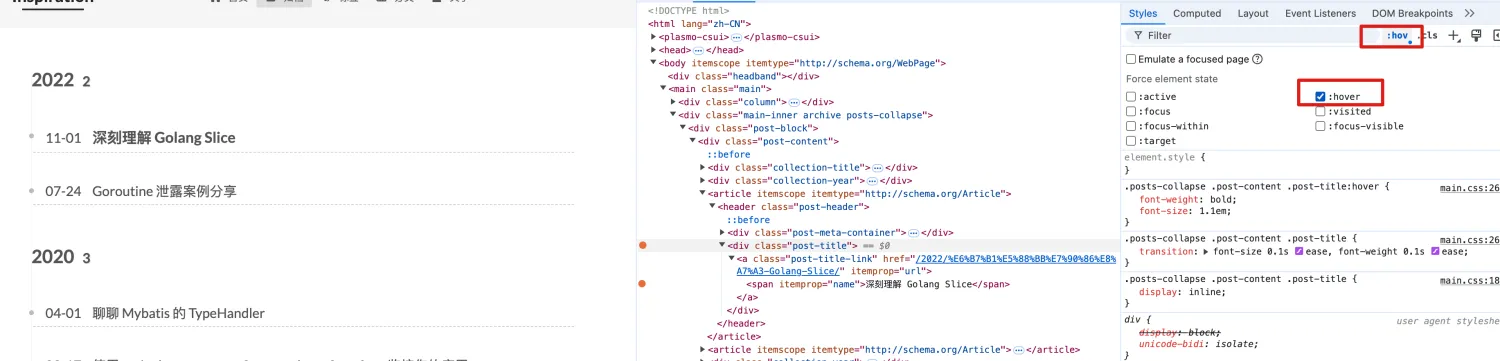
1
2
3
4
5
6
7
8
9
// 归档页 title 添加选中的加粗放大效果和动画 .posts-collapse .post-content .post-title { transition : font-size 0.1s ease, font-weight 0.1s ease; } .posts-collapse .post-content .post-title :hover { font-weight : bold; font-size : 1.1em ; }
一个小技巧是,在调试的时候可以通过图示的方法显示 hover 后的显示效果,这点击后可以看到加粗
超链接 原始主题超链接与正文文字颜色相近,仅仅添加一个比较浅的下划线,如果想改超链接的显示颜色,可以添加如下代码
1
2
3
4
5
6
7
8
9
10
11
12
13
14
15
16
17
18
19
20
21
22
23
:root { --post-body-link-color : #b84848 --post-body-link-hover-color: #db5a5a } if (hexo-config('darkmode')) { @media (prefers-color-scheme : dark) { :root { --post-body-link-color : #c5603e --post-body-link-hover-color: #e5724b } } } // 修改正文中的超链接颜色,但不修改阅读原文的链接颜色 .post-body a :not (.btn ) { color : var (--post-body-link-color) //超链接显示颜色 border-bottom-color: var (--post-body-link-color) &:hover { color : var (--post-body-link-hover-color); //鼠标移动上去后超链接颜色 border-bottom-color : var (--post-body-link-hover-color) } }
最后附上完整的修改 1 2 3 4 5 6 7 8 9 10 11 12 13 14 15 16 17 18 19 20 21 22 23 24 25 26 27 28 29 30 31 32 33 34 35 36 37 38 39 40 41 42 43 44 45 46 47 48 49 50 51 52 53 54 55 56 57 58 59 60 61 62 63 64 65 66 67 68 69 70 71 72 73 74 75 76 77 78 79 80 81 82 83 84 85 86 87 88 89 90 91 92 93 94 95 96 97 98 99 100 101 102 103 104 105 106 107 108 109 110 111 112 113 114 115 116 117 :root { --archive-post-content-before-color : #f5f5f5 --post-body-link-color: #b84848 --post-body-link-hover-color: #db5a5a } if (hexo-config('darkmode')) { @media (prefers-color-scheme : dark) { :root { --archive-post-content-before-color : #454545 --post-body-link-color: #c5603e --post-body-link-hover-color: #e5724b } } } // 调整归档页面 css 样式 // 隐藏归档页面总文章title .posts-collapse .post-content .collection-title { display : none !important ; } // 竖线是这个 before 元素控制的,改细,同时稍微一动位置与标题栏前的圆心对齐 // 左侧的竖线原来太抢眼了,这里弱化竖线的视觉效果 .posts-collapse .post-content ::before { background : var (--archive-post-content-before-color) margin-left: -0.5px top: 1em width: 1px } .posts-collapse .post-content .collection-year .collection-year-count { background : none } // 年份缩进,看起来就更有层次感 .posts-collapse .post-content .collection-year { margin : 40px 0 0 0 ; } // 去掉掉年份前的圆点 .posts-collapse .post-content .collection-year ::before { display : none; } // 调整归档页面的上的间距 .posts-collapse .post-content .collection-header { margin : 0 0 0 0 ; } // 文档标题字体整体放大,强调一下视觉效果 .posts-collapse .post-content .post-header { font-size : 1.1em } // 文档标题前的日期字体方法,原来其实是个缩小效果,这么写之后就取消了缩小效果 .posts-collapse .post-content .post-meta-container { font-size : inherit; } // 减小页面最上方的空隙 .archive .post-block :first -of-type { padding-top : 0 ; } // 归档页 title 添加选中的加粗放大效果和动画 .posts-collapse .post-content .post-title { transition : font-size 0.1s ease, font-weight 0.1s ease; } .posts-collapse .post-content .post-title :hover { font-weight : bold; font-size : 1.1em ; } // 首页 post 间距调整 .posts-expand .post-block :first -of-type { padding-top : 40px ; } .posts-expand .post-block :not (:first -of-type) { margin-top : 60px ; } // 分页 .pagination { margin : 60px 0 0 ; } .pagination .prev , .pagination .next , .pagination .page-number , .pagination .space { margin : -1px 10px 0 0 ; padding : 0 10px ; } // 减小 tag 页面最上方的空隙 .tag .post-block :first -of-type { padding-top : 0 ; } // 减小 category 页面最上方的空隙 .category .post-block :first -of-type { padding-top : 0 ; } // 修改正文中的超链接颜色,但不修改阅读原文的链接颜色 .post-body a :not (.btn ) { color : var (--post-body-link-color) //超链接显示颜色 border-bottom-color: var (--post-body-link-color) &:hover { color : var (--post-body-link-hover-color); //鼠标移动上去后超链接颜色 border-bottom-color : var (--post-body-link-hover-color) } }